I’ve been trying to generate retro style AI photos that look like they were shot on old film cameras, but my results keep looking too modern or over-edited. I’m not sure what prompts, settings, or tools I should be using to get that authentic vintage look with grain, color fade, and old-school lighting. Can anyone share specific prompt ideas, tools, or workflow tips to help me nail believable retro AI photos for social media and prints?
Retro AI photo stuff has been blowing up in my feeds, so I tried it instead of renting clothes or hunting down some crusty looking diner for photos.
Short version, you upload a few selfies, pick a style, and the app spits out photos of you in old-school outfits, interiors, cars, all that.
Here is what I ended up using and how it went.
Why I ended up with Eltima AI Headshot Generator for retro pics
I tested a few tools and bounced off most of them because they felt like a filter slapped on top of a normal selfie. Faded colors, a bit of grain, same hoodie.
Eltima AI Headshot Generator here:
worked a bit differently. It treats it more like a full photo session. New outfit, new background, same face.
What helped:
• Themed packs
There are packs built around certain vibes. Think:
- 70s style clothing in an old living room.
- 90s-looking street photos.
- Retro studio portraits with that stiff yearbook energy.
You pick a pack instead of typing prompts, so you do less trial and error.
• Costumes and backgrounds baked in
You do not have to describe “vintage interior with wood paneling” or “classic car by the curb” with prompt poetry. The app swaps in clothes and backgrounds for you, based on the pack.
I got:
- One shot in a fake old apartment with patterned wallpaper.
- Another in what looked like a city sidewalk from some older movie.
Same face, different “eras”.
• Face stays consistent
A lot of these apps mess up your face across styles. You get ten strangers with a familiar jawline.
Here it stayed closer to my real face across packs, so it looked like one person in multiple retro shoots, not random NPCs.
• You get a batch, not one-off images
Instead of generating a single picture, it gives you a bunch for each pack. Some look off, some look good, you pick your favorites and ignore the weird ones.
What I got out of it
Here are two examples it generated from my selfies:
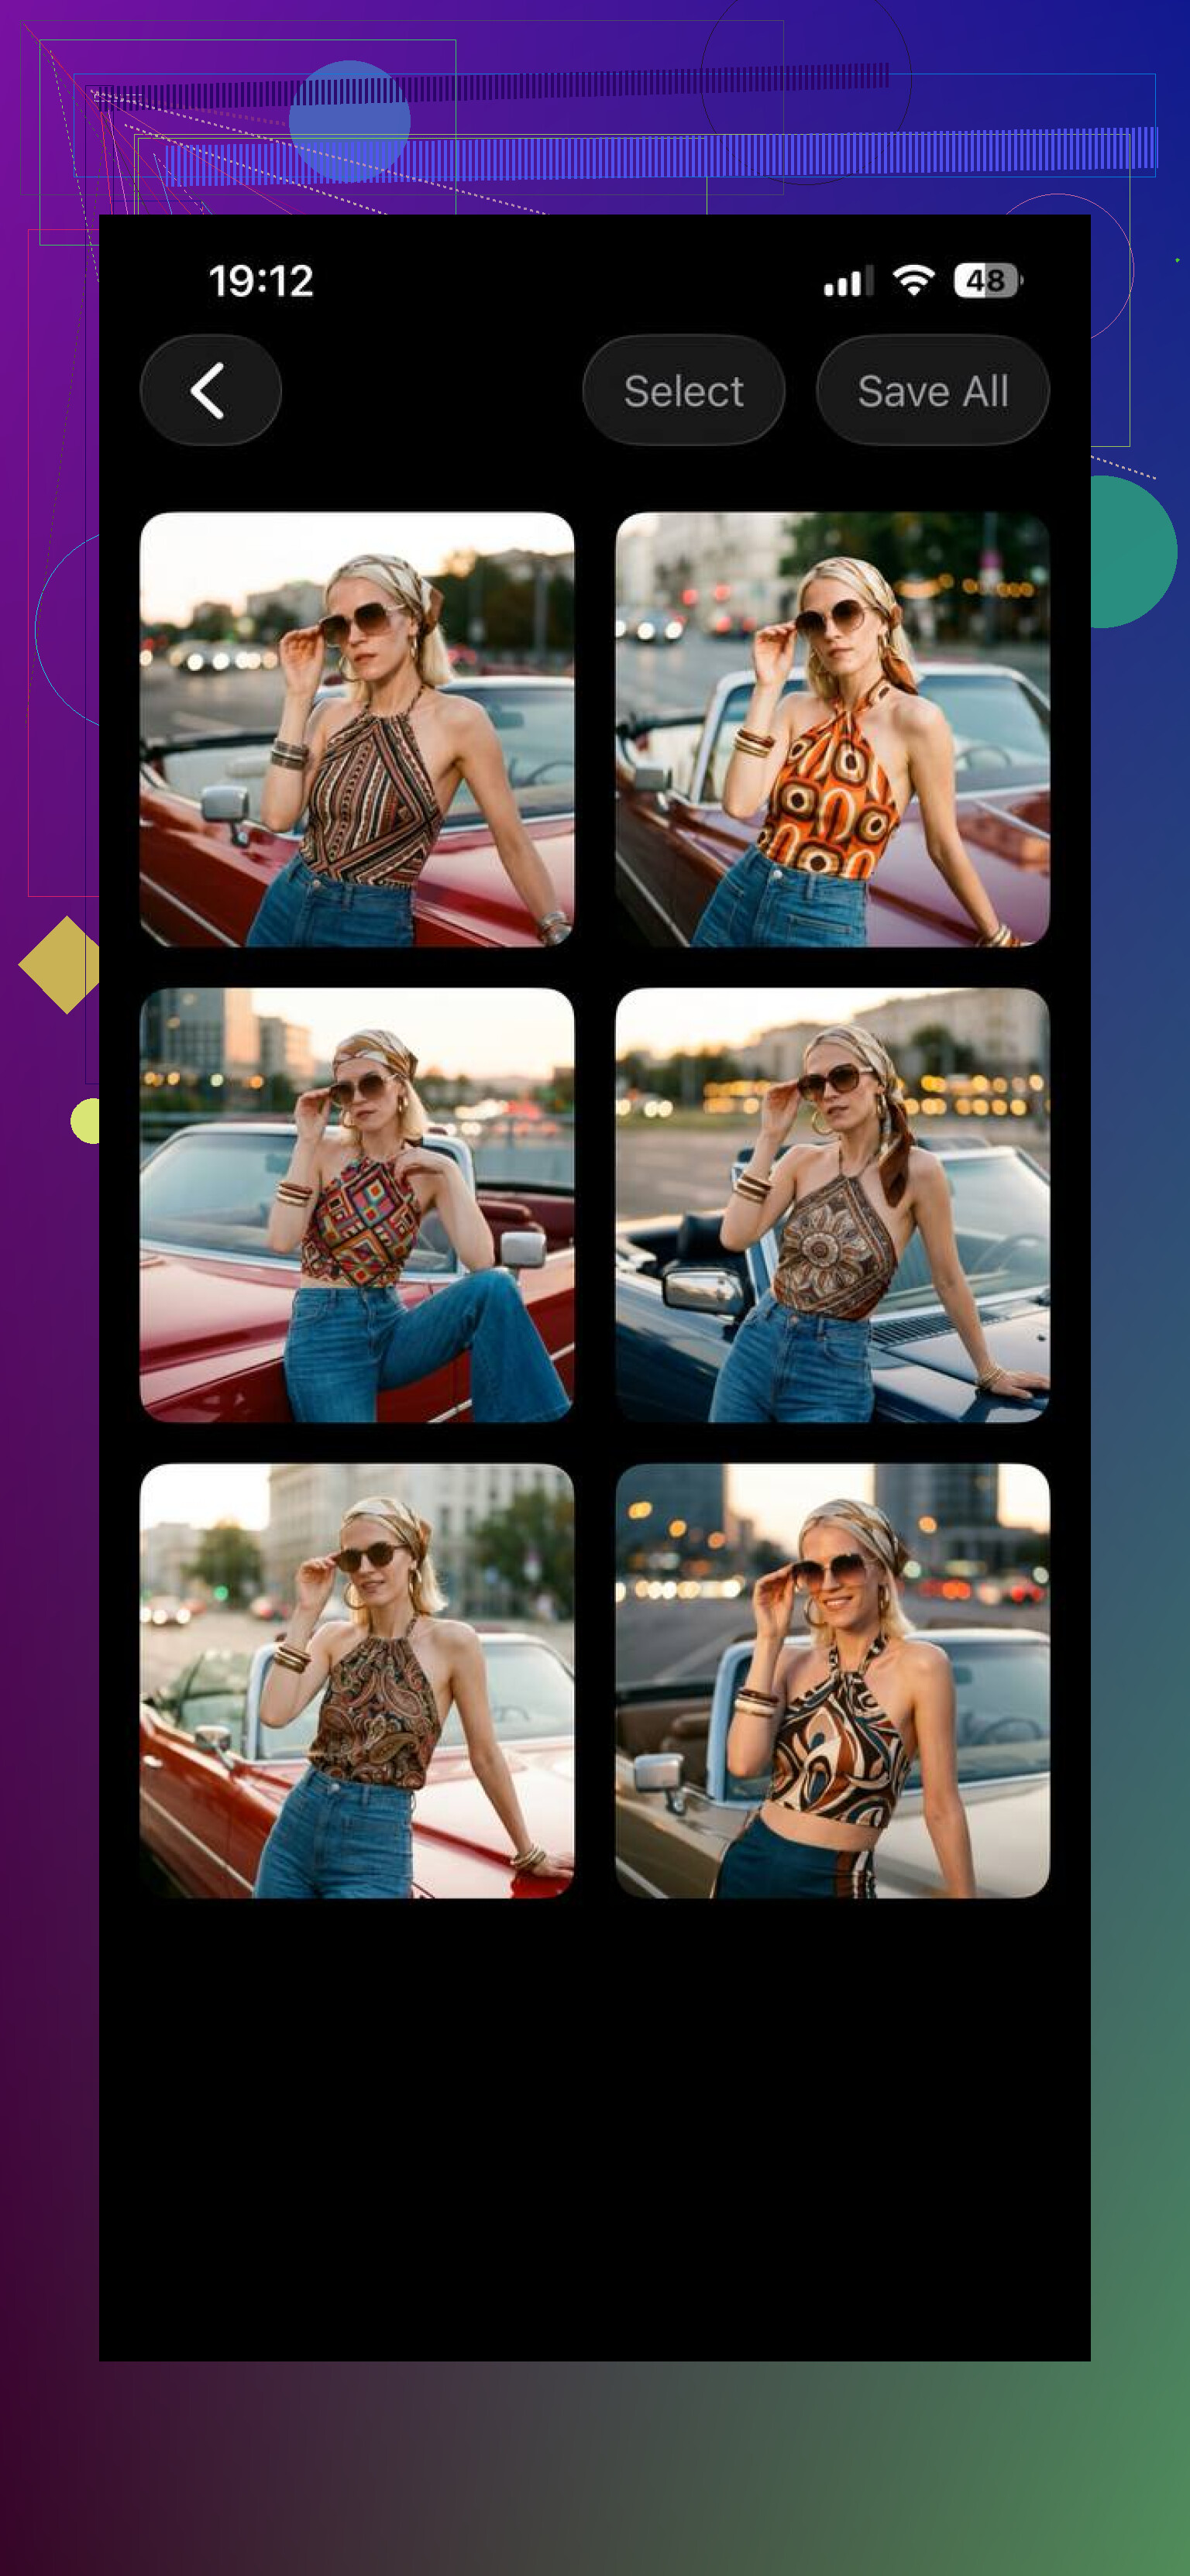
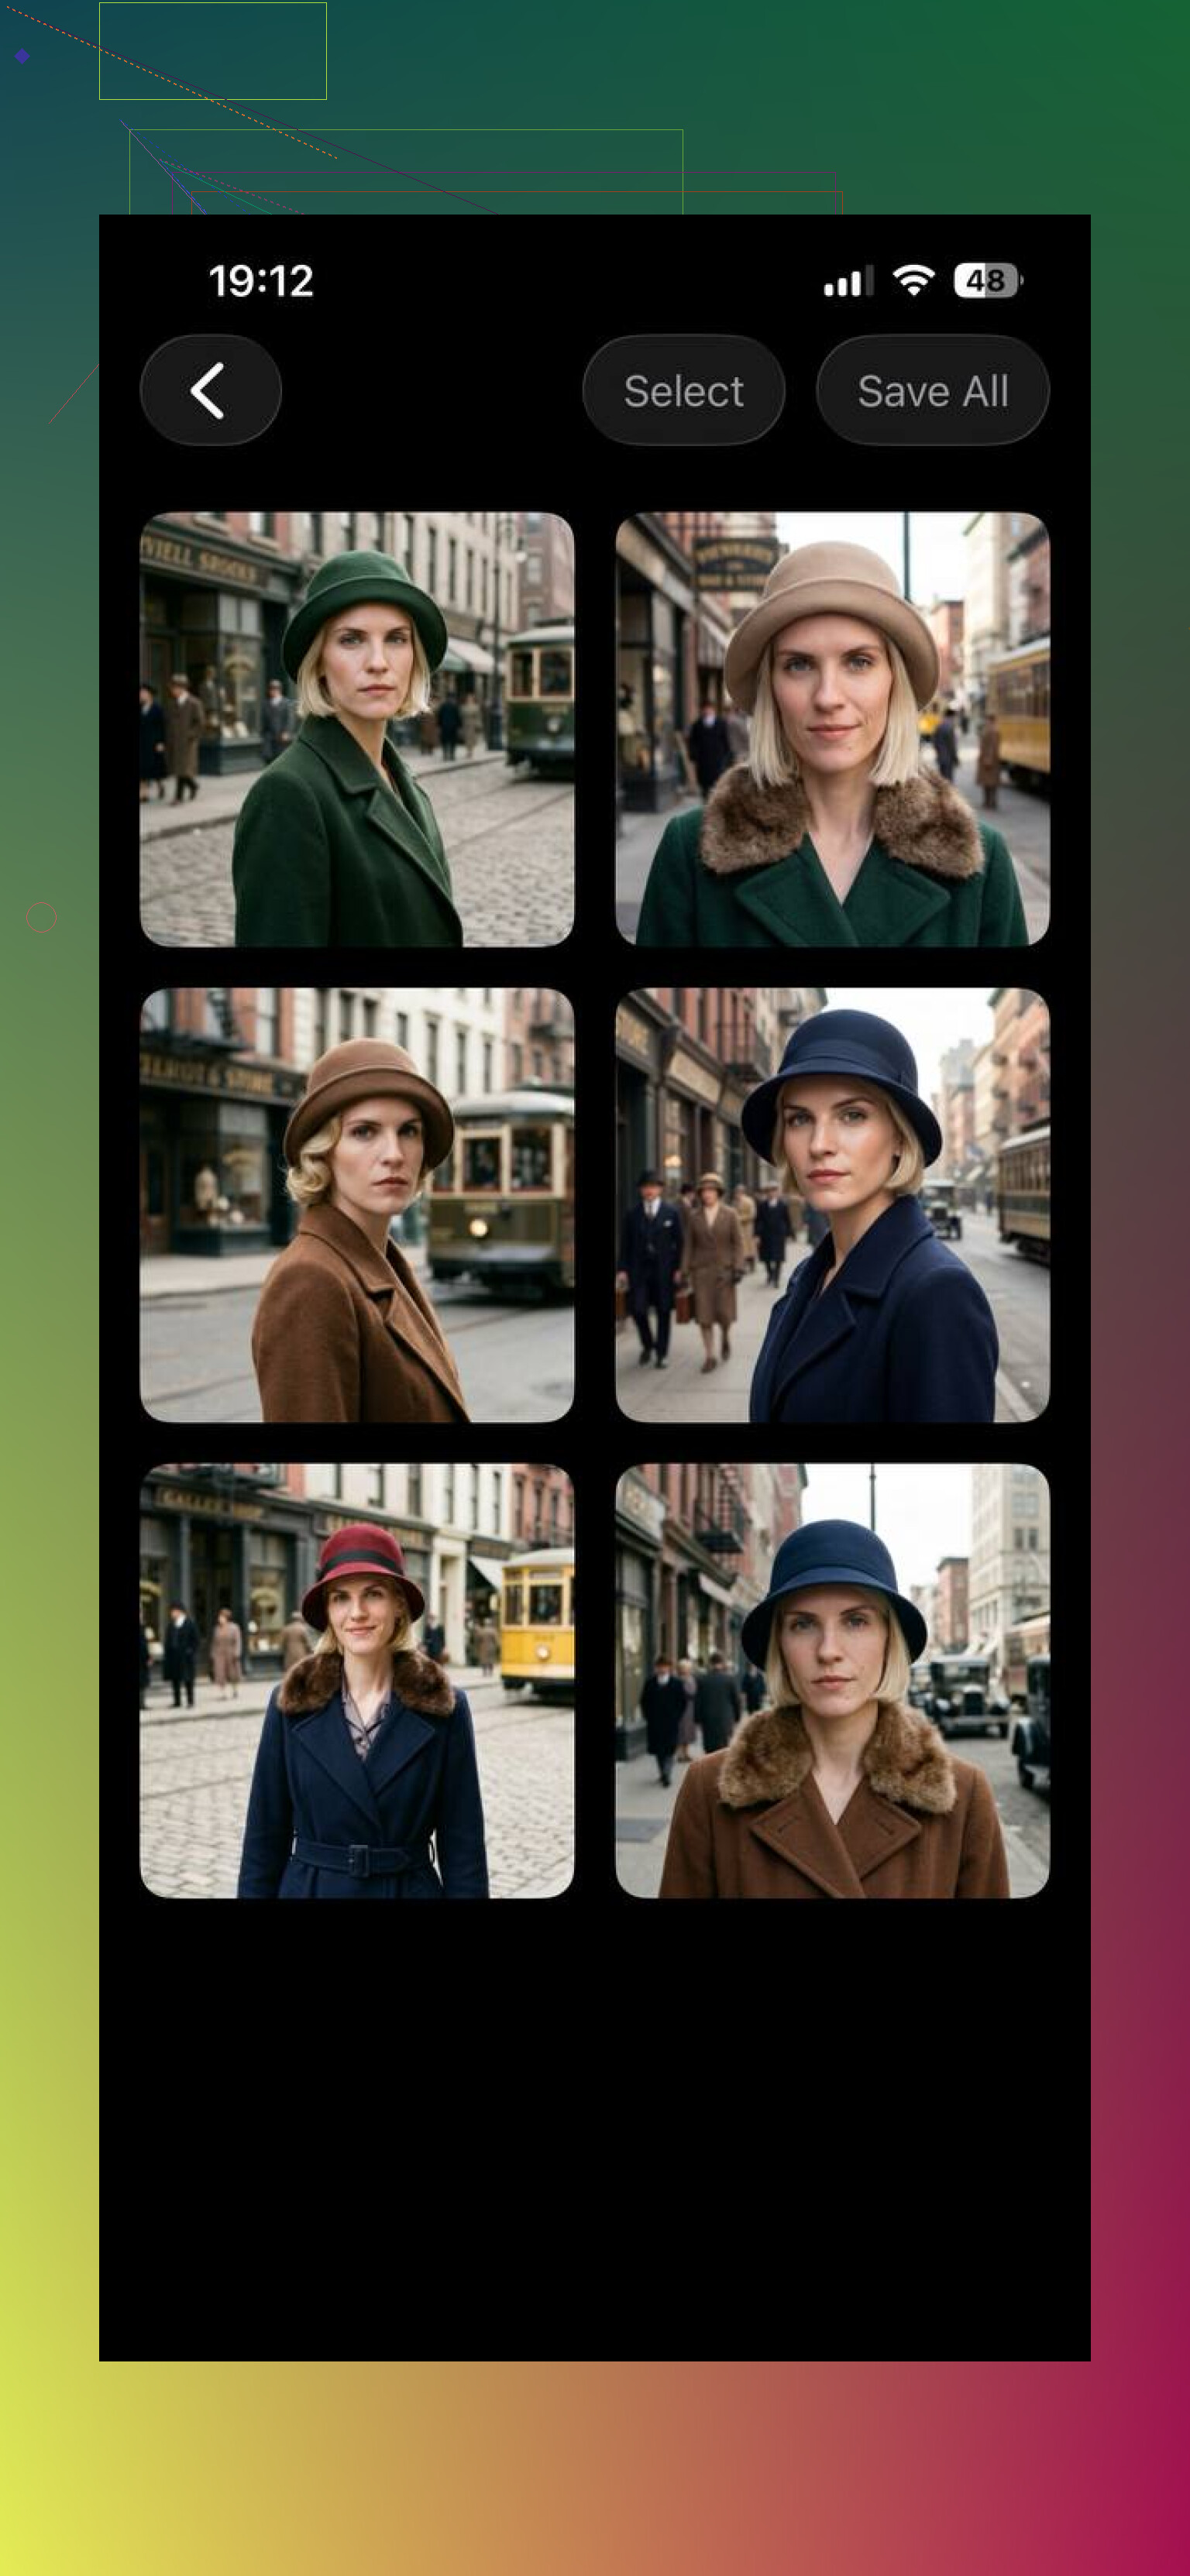
I did not have those clothes. I did not go to any of those locations. Those came from the app styles.
How to create retro AI photos with it
The tutorial that helped:

What I did step by step:
-
Took and uploaded several selfies
- Neutral lighting, no heavy makeup, no filters.
- Different angles, but same face expression helped.
- Avoided sunglasses or big hats that hide features.
-
Picked a retro or vintage-style pack
Inside the app, I scrolled through the packs and picked the ones labeled with older style vibes, like classic portraits or period looks. -
Generated the images
Hit generate and left the app alone for a bit. It did a whole set, not one picture. -
Downloaded only the decent ones
- Deleted images where the hands or ears looked odd.
- Saved the ones where the face looked most like me and the outfit and background matched the retro idea.
From my tries, the cleaner the selfie, the more normal the output. Blurry selfies gave weird skin textures or strange details. Front-facing shots with good light gave more believable results.
When this is worth doing
If you want:
- “Old photo of me” for a profile or post.
- Fake yearbook style shots.
- A fun retro theme set without paying a photographer.
Retro AI is an easy shortcut. No wardrobe, no props, no location scouting.
I ended up sticking with Eltima for this type of thing:
Not because it is perfect, but because:
- The themed packs save time.
- The environments look less like random AI noise.
- The face stays mostly consistent across different retro looks.
If you go in knowing you will delete half the outputs and keep a handful that look right, it becomes useful for quick vintage-style images without doing a real shoot.
16 Likes
You are running into two problems: AI style choices and “digital clean” output. Retro film looks dirty, limited, and a bit wrong. You want to force those flaws.
Here is a workflow that stays at home, no outfits or sets needed, and does not repeat what @mikeappsreviewer already covered with Eltima AI packs.
- Start with the right kind of tool
Use a general image generator, not only headshot apps. Examples you can try:
• Midjourney or DALL·E for base images
• Then a separate editor like Lightroom, Darkroom, VSCO, or even Snapseed for “film” finishing
I disagree slightly with relying only on themed packs. They are fast, but you lose control over which film era you hit.
- Prompt structure that pushes “old film”
Use short, clear prompts. Avoid long poetic stuff. Example base:
“portrait photo of a person in 1970s style, shot on 35mm film, soft focus, slight motion blur, natural light, realistic skin, muted colors”
Then add more technical film cues:
For 60s or 70s:
• “shot on kodak portra 160, grainy, slight color shift, halation around highlights, light leak on left side”
For 80s or 90s:
• “shot on 35mm point and shoot camera, direct flash, on-camera flash, overexposed highlights, cheap film, slight vignette”
Key is to remove the “perfect digital look”:
• Add “slightly out of focus” or “soft focus”
• Add “subtle film grain”
• Add “muted colors, low contrast”
• Avoid “sharp, hyper detail, 8k, ultra hd” in your prompt
Prompt example:
“street photo of a person in 1993, on-camera flash, shot on cheap 35mm film, slight blur, film grain, low contrast, color shift, date stamp in corner”
- Use negative prompts to fight the modern look
If your tool supports negative prompts, add:
“no hdr, no ultra sharp, no high dynamic range, no neon colors, no glossy skin, no lens flare, no bokeh balls”
This strips out the AI’s favorite modern tricks.
- Do a separate “film pass” in an editor
Even if the AI gives you a decent retro base, you often need a second step.
In Lightroom, VSCO, etc:
• Drop contrast a bit
• Lower clarity or texture a bit
• Add grain, but keep the size slightly big, not tiny noise
• Warm the image slightly for a 70s vibe, cool for some 90s cheap film looks
• Shift greens more yellow and reds a bit orange for Kodak style
• Add slight vignette
For a stronger fake-film look, use dedicated film apps or plugins:
• RNI Films
• VSCO with specific film presets
• Filmborn style apps
These presets emulate Portra, Fuji, etc. Start with a film preset, then remove intensity so it does not look like a pure filter.
- Add “physical” artifacts
Modern AI misses the physical damage. You can add:
• Light leaks
• Dust and scratches
• Frame borders
• Date stamp
Free or cheap ways:
• Download overlay PNGs of dust, scratches, light leaks, borders
• In any photo editor, place them on top, set blend mode to screen or overlay, lower opacity
You want artifacts small and uneven. If you overdo, it looks like a fake Instagram filter from 2013.
- Control clothing and setting with prompts
Era clothing:
• 70s: “wide collar shirt, bell-bottom pants, brown and orange tones, wood paneling”
• 80s: “denim jacket, graphic tee, mall interior, neon sign but low brightness”
• 90s: “baggy jeans, oversized sweatshirt, suburban street, parked old sedan”
Background:
• “indoor, wood paneled walls, old box TV, patterned couch”
• “parking lot, old grocery store sign, faded colors”
• “school photo backdrop, gradient blue background, awkward pose”
- Use your real face with an “image to image” flow
If you want your actual face, not only fictional people:
• Upload a clean selfie, neutral lighting, no filter
• Use an “image to image” mode and add your retro prompt
• Lower the strength so the AI keeps your face structure and changes clothes, color, background
I agree with @mikeappsreviewer that clean input helps a ton. Blurry or filtered selfies give messy skin and plastic shine.
-
Dial the resolution down
Old photos were not 4k.
• Generate at moderate resolution, like 1024 or similar
• If you upscale later, keep added grain so it does not look like a modern, sharp composite -
Quick recipe to test
Try this exact flow on any general AI model with image to image:
Prompt:
“portrait of a person in 1978, living room interior, wood paneling, shot on kodak portra 160, 35mm film, soft focus, film grain, low contrast, slight warm color cast, subtle light leak”
Negative:
“no hdr, no ultra sharp, no neon, no modern interior, no glossy skin, no makeup”
Then finish in an app with:
• Contrast -10
• Clarity -5
• Grain amount medium, size medium
• Slight vignette
• Warm temperature +5 to +10
That combo gives a much more believable “found in an old box” vibe instead of a clean Instagram edit.
You’re already getting solid stuff from @mikeappsreviewer and @suenodelbosque, so I’ll skip packs and hyper-detailed prompts and come at it from a slightly different angle: you’re probably too focused on “retro” as a filter instead of “retro” as a limitation.
Think in terms of what old cameras actually couldn’t do.
- Stop letting the model be fancy
Most models are trained to spit out shiny, contrasty, “ad” photos. Fight that at the settings level, not just in prompts.
- Use lower CFG / guidance (if your tool has it). Too high = crispy modern look.
- Don’t upscale in the AI tool. Old photos weren’t razor sharp 4k. Generate at mid res and, if you upscale later, add grain back manually.
- Pick one era and stick to it for a session
Where people mess up: mixing “70s vibe, 90s outfits, 80s lighting” in one batch. AI then averages it and you get timeless Instagram mush.
Do “one roll of film at a time”:
- Session 1: “mid 70s family snapshots in a small apartment”
- Session 2: “late 80s cheap point and shoot with harsh flash at night”
Keep clothing, hair, and locations consistent per session. That fake “coherence” does more than yet another “film grain” tweak.
- Use boring compositions on purpose
Retro snapshots are often badly framed. Too modern = perfect composition, subject centered, ideal pose. Try:
- Off center subjects
- Cropped foreheads or chopped elbows
- Slight tilt to the horizon
Tell the AI things like “casual snapshot, awkward composition, slightly off center, accidental crop” instead of “cinematic portrait”.
- Make the lighting lame, not cinematic
Here I’d actually disagree a bit with some of the very polished retro looks people chase. Most real old pics are lit terribly.
Prompt for:
- “on camera flash, harsh shadows on wall” for 80s/90s
- “dim indoor tungsten lighting, mixed color temperatures, uneven light” for 60s/70s
Avoid all those “soft cinematic rim light” vibes. That screams 2020, not 1975.
- Skin should not look like beauty ads
A big tell of AI / modern edits is ultra smooth plastic skin or hyper-detailed pores. Both look wrong for film.
- If your tool has “sharpness”, “clarity”, or “detail” sliders, turn them slightly down
- In post, add a tiny bit of blur or reduce texture on skin only. Imperfect, slightly mushy faces feel more believable than hyper-defined lashes and pores.
- Color is where most people fail
You can skip the fancy “Portra 160” style prompts and just fix color logically after. Old film often has:
- Faded blacks (lift the blacks so they are grayish, not pure black)
- Slight color cast (yellow / green for old prints, blue for cheap lab scans)
- Muted saturation, but some channels slightly off
Instead of cranking a film preset to 100, do: - Lower contrast
- Lower saturation a bit
- Lift blacks
- Add a tiny warm or cool tint overall, not both
Once it looks a tad “wrong”, you’re closer to the real thing.
- Don’t forget context props
You can have perfect grain and color and it still feels modern if everything in frame is 2024.
Alongside what @suenodelbosque said, add props that lock the year:
- Cable phones, box TVs, fat computer monitors
- Old cars that match the decade
- Posters, magazines, billboards from that era
If your backgrounds keep sneaking in smartphones, LED strips, or modern cars, explicitly ban them in your prompt / negative prompt.
- Print-and-scan cheat code
This is janky but it works absurdly well:
- Generate your “retro-ish” AI image
- Print it on regular printer paper
- Take a slightly crooked phone photo of that print under average room light
- Crop that phone photo and tweak contrast a bit
You instantly get weird paper texture, subtle blur, off-white “paper” tone, and phone camera noise that AI doesn’t quite emulate yet. It’s often way more convincing than endless virtual grain sliders.
- Be okay with “ugly”
Most people keep editing until the image looks “cool”. Real old snapshots are often kind of ugly: blown highlights, muddy shadows, bad flash, awkward poses.
If your result looks like a fashionable campaign with fake grain sprinkled on top, you’ve gone too far into modern territory. Dial it back until it looks like something you’d actually find in a shoebox at a thrift store, not on a moodboard.
If you post one of your “too modern” tests, people can pick it apart and point out exactly where the modern look is creeping in: usually it’s razor sharpness, perfect framing, and overly nice lighting, not the lack of “vintage” keywords.